Most people quit FPV in the first three weeks, and it is almost never the flying that does it. It is a kit that needs a soldering iron, a battery that shows up at 40 percent, or goggles that fog up before the quad leaves the ground. If you want an FPV drone for beginners that gets you airborne on day one, buy for the boring parts: a complete kit, spare parts you can actually order, and a battery you can charge from a USB port.
I have been flying commercially since 2015, starting on a Phantom 2 and working up to rigs that cost more than my truck. My logbook is mostly Phoenix summers, which is a polite way of saying I have killed more batteries to heat than to crashes. The beginners I coach on weekends make the same three mistakes, and none of them are about stick skills.
This is the workflow I walk them through. What to buy, how to set it up, and what to do in the first hour so the quad comes home in one piece.
Why you should trust me
I fly four to five days a week for real estate, weddings, and solar farm inspections. I have owned or flown more than 20 drones, from toy-class quads to a $15,000 enterprise rig, and I keep notes on all of it: battery degradation, gimbal failures, and the way a "40 minute flight time" claim dies in a 110 degree Arizona afternoon.
That matters here because the failures that end a first flight are almost always power and setup failures, not piloting failures. Get the power side right and the flying takes care of itself.
How I picked these two kits
I did not run a stopwatch on either of these two, so I am not going to pretend I did. What I did was filter every starter quad I could find against five things that matter for a first drone:
- Ready to fly out of the box, meaning the radio, the goggles where they apply, and at least one battery are in the box.
- Spare parts you can order, because props and motors are consumables, not accessories.
- Altitude hold, because it removes the throttle juggling that eats your first hour.
- Indoor flyability, because wind is the enemy of a light quad and your first 20 flights should happen indoors.
- A battery you can charge without a specialty charger, because a kit that needs an expensive charger is not a starter kit.
Then I threw out everything that needed soldering, everything that needed a separate goggle purchase, and everything where a set of replacement props cost more than the quad. Two kits survived, and they sit at opposite ends of the starter market.
One thing to do before the box arrives: take the FAA's TRUST test if you are flying recreationally in the US. It is free, it is online, and it takes about 20 minutes. Charge your batteries while you do it.
The two kits I would start with
One of these teaches real FPV, with goggles and a live camera feed. The other teaches throttle control to a kid in a living room. Both are honest about what they are, and neither one requires you to own a soldering iron.
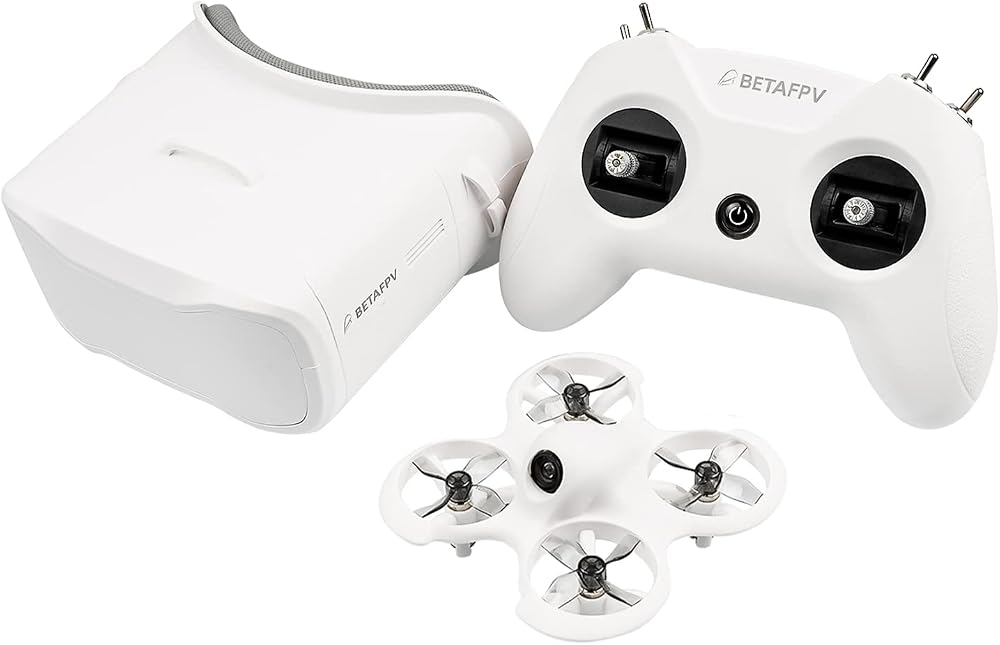
Our pick: BETAFPV Cetus FPV Kit Brushed Racing Drone RTF Kit for FPV Beginners | FPV Simulator Supported, Height Hold Function, With VR02 FPV Goggles for FPV Drone Fly Indoor Outdoor
 Visit on Amazon →
This is the kit I point adults at, and the reason is the simulator support. You can fly the same style of quad on your computer before you ever arm the real one, which is the cheapest possible way to build stick memory before anything can break. The kit arrives ready to fly with the quad, a radio, VR02 FPV goggles, and batteries. Check current Amazon price.
The feature that matters most on a first flight is altitude hold. Let go of the throttle and the quad holds its height instead of dropping into the carpet. That one behavior turns a stressful first hover into something you can actually think through.
It is sold as a racing kit. Ignore that part. Brushed motors are not a racing setup, they are a cheap-to-replace setup, and cheap to replace is exactly what you want while you are still learning which stick does what. The goggles are entry level, the range is short, and the whole thing is built for indoor and backyard flying. Check current Amazon price before you commit, because this category moves fast.
Flaws but not dealbreakers: Brushed motors have a finite life and you will eventually replace a set. The included goggles are not something you will keep if you stick with the hobby for a year. Neither of those is a problem for your first three months.
Anyone who wants to learn actual FPV, with a camera feed in a headset, should start here.
Budget pick: Bangcool 5 Year Old Boy Gifts Mini Drone for Kids RC Nano Quadcopter 2.4G 6 Axis with Altitude Hold Function, Headless Mode Remote Control Best Drone for Beginners & Kids(Red)
 Visit on Amazon →
This is the other end of the market. It is a toy-class nano quad, line of sight only, no goggles and no video feed. For a five year old's birthday, or for an adult who is not sure they will stick with it, that is exactly the right call. Check current Amazon price.
The two features that earn it a spot here are altitude hold and headless mode. Headless mode is the one to understand: the quad moves relative to you instead of relative to its own nose, which removes the hardest concept in the first week. New pilots lose orientation in about four seconds. Headless mode gives those four seconds back.
Six axis stabilization and a 2.4G radio round it out. It is red, it is small, and it will get pushed around by a ceiling fan, let alone a breeze. That is fine. Your first ten flights should be in a room with no wind anyway.
Flaws but not dealbreakers: It is a toy, and it flies like one. No camera feed, so it will not teach you FPV. What it will teach is throttle control and how not to panic, which is most of the job.
Anyone buying a first drone for a young kid, or testing the waters before spending real money, should look here.
The first-flight workflow, step by step
Now the part that decides whether you are still flying in a month.
Step one: Charge everything to full, and read the pairing sequence before you touch the quad. Pairing order trips up more beginners than wind does. On most kits the radio goes on first, then the quad. Shut down in reverse.
Step two: Take the TRUST test. In the US, recreational flyers need it, it is free, and it takes about 20 minutes online. Do it while the batteries charge.
Step three: Pick your first flying space. A living room with the ceiling fan off, or a driveway with no cars and no dogs. If you can feel a breeze on your face, it is too much wind for a first flight.
Step four: Calibrate on a flat, level surface. Both of these kits lean on accelerometers, and accelerometers drift when you initialize them on a couch cushion. Hard floor, level, then power up.
Step five: Hover at knee height and do nothing else for two minutes. Not forward, not turns. Hold it in one spot. This is the drill everyone tries to skip, and it is the one that builds the muscle memory.
Step six: Practice yaw, one quarter turn at a time. Rotate, stop, hold. Rotate again. New pilots combine yaw with forward pitch too early and end up in a wall.
Step seven: Land at 30 percent battery, every time. Not when it beeps, not when it drops out of the air. At 30 percent. This is the habit that extends battery life, and almost nobody builds it.
Step eight: Do the post-flight check. Feel the motors, look at the props for nicks, and let the battery cool to room temperature before it goes back on the charger. A hot battery straight onto a charger is a battery you are shortening on purpose.
Repeat those eight steps for a week before you attempt anything clever.
Battery rules that save you money
Batteries are the real cost of this hobby, and heat is what kills them. I have lost two batteries to Phoenix summers. They swell, they drop to 80 percent health, and then they stop taking a full charge.
Four rules worth taping to the wall:
- Never charge a battery that is still warm from a flight. Wait 20 minutes.
- Store at roughly half charge if you are not flying for a week. A full charge sitting in a hot garage is the worst case.
- Retire any battery that looks puffy. A swollen cell is a fire risk, not a performance issue.
- Buy a kit with an extra battery if you can, because one battery means ten minutes of flying and an hour of waiting.
What a first year actually costs
Do the math before you buy, and do it in the right order.
- The kit itself. Check current Amazon price on whichever one you pick.
- Two or three spare batteries, the line item that decides how much you actually fly.
- A set of spare props, because props are consumables and you will bend them.
- Replacement motors eventually, if you go with the brushed kit.
Divide the total by the number of flights you expect in a year. Fly twice a week and that is roughly 100 flights, which pushes the cost per flight down fast. The kit you fly is worth more than the kit you research for six months.
Where these two kits stop being enough
Both of these are indoor and backyard machines. You will know when you outgrow them, because you will want more range, a better camera, and goggles that do not feel like a cereal box. That is a different purchase and a different guide. Do not buy that drone first. Buy it after you have worn out a set of props on the cheap one, because the skills transfer and the crashes on the cheap one cost less.
The short version
Buy the BETAFPV kit if you want to learn real FPV with goggles. Buy the Bangcool if you are shopping for a kid or testing the water. Charge everything, calibrate on a hard floor, hover at knee height, and land at 30 percent. That is the whole job, and it is enough to take you from a box on the porch to flying in a week.