Beginner drone setup is not really about the drone. It is about the ten minutes on the ground before the props ever spin: the airspace check, the calibration on flat ground, the speed limit you set in the app, and the battery routine that decides whether you are still flying this thing in August.
I have watched a lot of first flights end badly, and almost none of them ended because the drone was cheap. They ended because the pilot skipped a step that costs nothing.
This is the workflow I hand to new pilots, in the order I actually run it, plus the two drones I would point a beginner at right now.
Why you should trust me
I fly commercially out of Phoenix, Arizona, shooting real estate, weddings, and solar farm inspections. I started on a Phantom 2 in 2015 and I have owned or flown more than 20 airframes since, from $300 toys to a rig that cost more than my truck.
I fly four to five days a week, often in 110-degree heat, and my logbook is full of the unglamorous stuff: batteries that swelled at 80% health, gimbals that started drifting after a dust storm, props that cracked on a hot landing pad.
That experience is exactly why I care about the beginner end of this hobby. The first drone decides whether there is a second drone. If the first one fights you, you quit. If it hovers when you let go of the sticks, you are hooked.
How I picked and what I checked
Honest scope first: I have not flown these two exact units, so I am not going to pretend I measured their flight time in Phoenix heat. What I did was run both against the checklist I use for every beginner drone that crosses my bench, using the manufacturer specifications and the listing details.
That checklist has seven items, and it has not changed in years:
Motors. Brushed motors are consumables. They wear out in tens of hours and they are soldered in on the cheap stuff. Brushless motors last years and are replaceable. For a beginner, brushless is the single biggest durability upgrade you can pay for.
Position hold. GPS hold is the gold standard outdoors. Optical flow is the indoor answer: it reads the floor with a downward sensor and holds position without a satellite lock. A drone with neither drifts into walls, and you spend your first month fighting it instead of learning.
Battery count. One battery is a 12-minute hobby. Two batteries is an afternoon. Batteries are the real cost of drone ownership, and a kit that ships with spares is worth more than a kit with a nicer box.
Prop guards. For indoors and for a first month, guards turn a crash from a broken arm into a bounced landing. They are also the cheapest insurance you can buy.
Camera honesty. A 1080p camera with a stabilized or adjustable lens beats a 4K camera that jitters. For a beginner, the lens mount matters more than the resolution number.
Weight and registration. Anything over 0.55 pounds flown recreationally in the US needs FAA registration. Sub-250-gram drones skip that step, which is a real convenience for casual flyers.
The app. If the app needs an account, a firmware update, and three permissions before the drone will arm, that is a design problem. The app is part of the product.
Both drones below clear the parts of that list that matter most for a new pilot.
Two beginner drones that fit this workflow
These are different tools for different first months. One teaches you to fly with goggles and a spotter. The other teaches you to fly in a living room and a small backyard without leaving a mark on the drywall.
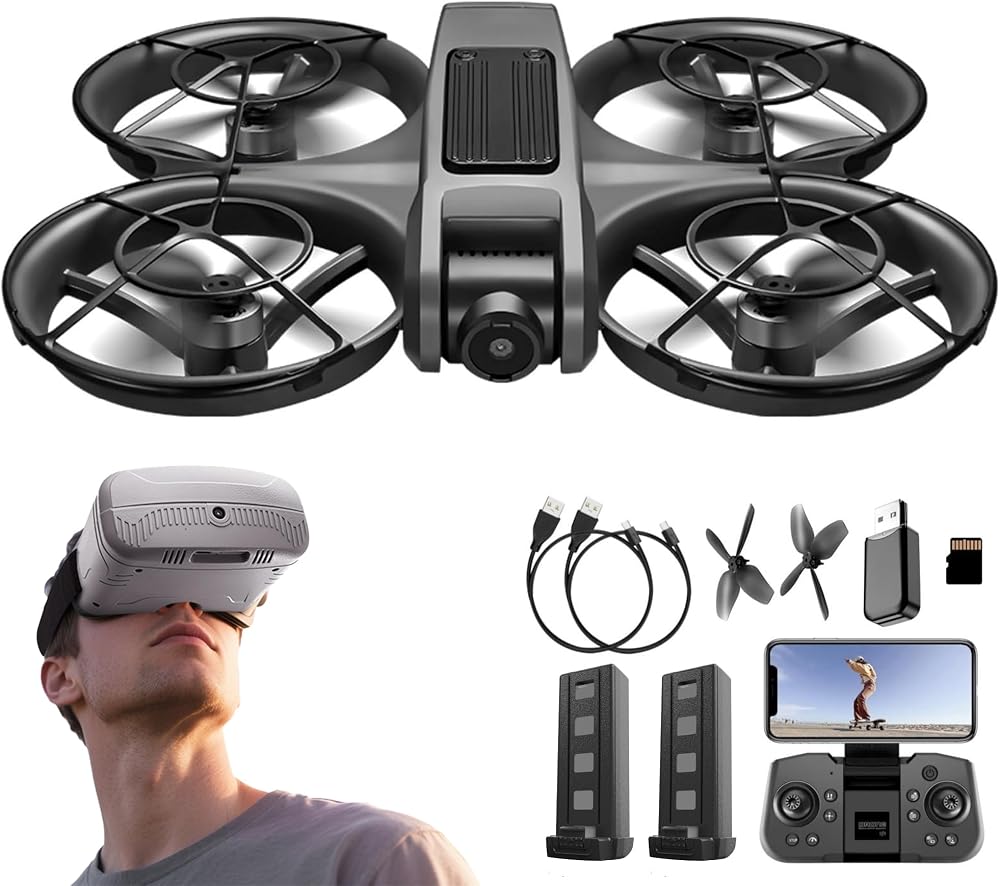
Best for learning FPV: Adult FPV Drone with VR Goggles, First Person View, 1080P HD Camera for Beginners Quadcopter, 360° Flip Stunt, Brushless Motor, Optical Flow Position Hover, Adjustable Speed, Propeller Guards, One Key Takeoff & Landing, Remote Control Aircraft for New Pilots, 2 Batteries & SD Card Included
 Visit on Amazon →
Check current Amazon price.
This is the one I would hand someone who already knows they want to fly first person view. The brushless motors put it in a different durability class than the brushed toys that fill this price bracket, and brushless is the difference between a drone you keep for two seasons and a drone you replace by fall.
Optical flow position hold is the feature that makes it flyable for a beginner. Without GPS, that downward sensor is what keeps the aircraft from sliding across the room when you release the sticks. Adjustable speed matters just as much: you can run it slow and forgiving for week one, then open it up once your thumbs stop panicking.
The kit includes two batteries and an SD card, which is the right way to package a beginner drone. Two batteries is roughly a real afternoon of flying with charging breaks. The SD card means you are not driving to a store on day one because you forgot that the camera does not store anything on its own.
Two things to know before you buy. First, the goggles are the point, and goggles in the US mean you need a visual observer standing next to you, keeping eyes on the aircraft while you are under the hood. That is not optional and it is not a technicality. Bring a friend or fly line of sight until you have one. Second, prop guards plus one-key takeoff and landing are beginner features, not weaknesses. Use them for the first month and stop apologizing for it.
The 360-degree flip and stunt modes are fun, and I would still leave them alone until you can hold a stable hover in a crosswind. Stunt modes teach bad stick habits to people who have not built good ones yet.
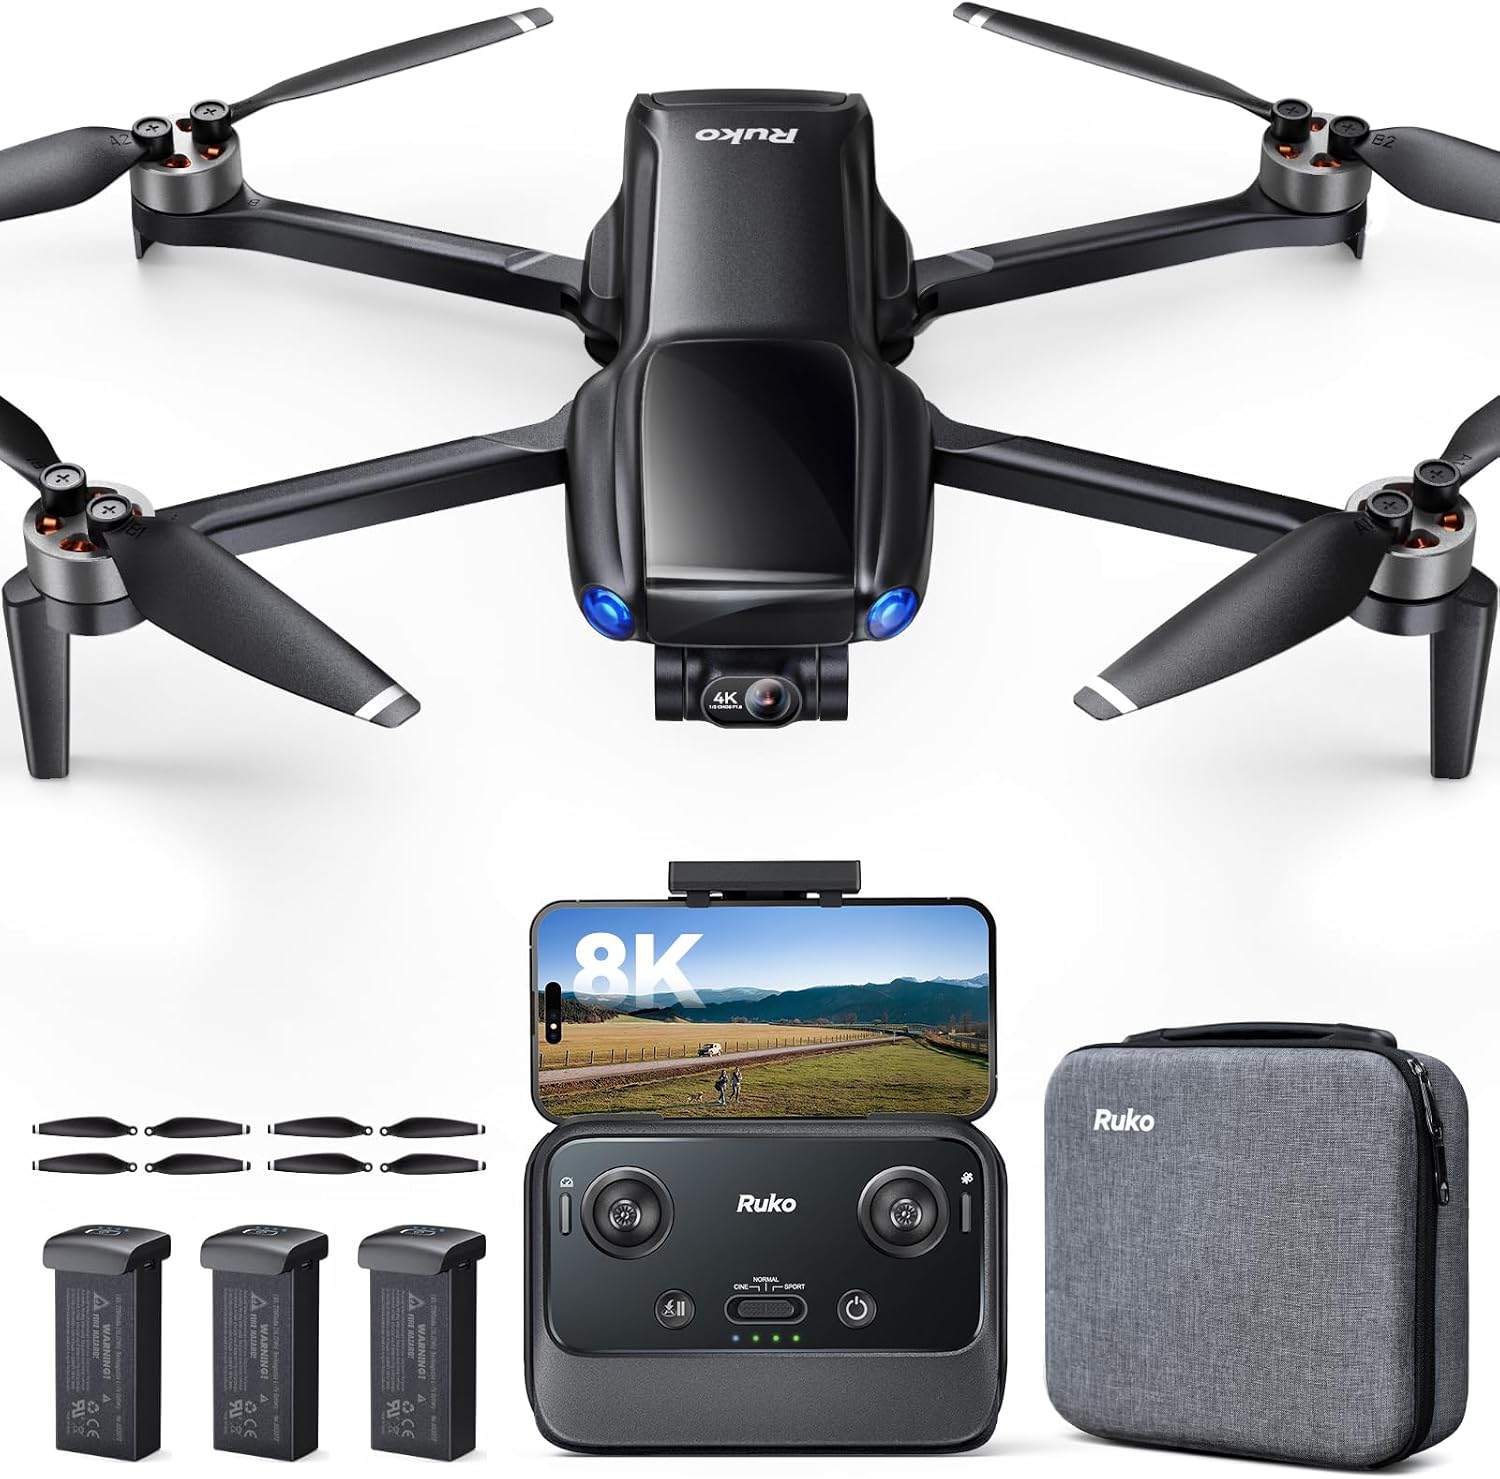
Best for tight spaces and indoor practice: Oddire Mini Drone with Camera - 1080P HD Foldable Drone with Stable Hover, Gravity Control, Auto-Follow, Trajectory Flight, 90° Adjustable Lens, One Key Take Off/Land, 3D Flip, Drones for Adults
 Visit on Amazon →
Check current Amazon price.
This is the indoor and small-backyard option, and the foldable frame is the reason. A drone that folds flat lives in a bag instead of on a shelf, and a drone that lives in a bag gets flown. That sounds like a small thing. It is not. The drones I fly most are the ones that are easy to grab.
The 90-degree adjustable lens is the spec I care about most here. Fixed cameras on cheap drones point at the horizon and nothing else, which makes every shot look like the same shot. An adjustable lens lets you point down for a top-down look or up for a low-angle pass without buying a gimbal.
Stable hover is the feature that makes indoor flying possible. In a room with no GPS, hover stability comes from the flight controller and the optical sensors, and a drone that holds altitude is a drone you can fly in a hallway without clipping a doorframe every ninety seconds.
The automated modes, gravity control, auto-follow, and trajectory flight, are the part I would treat carefully. They are genuinely useful once you understand what the drone is doing, and they are a bad way to learn because you are not the one flying. Learn to hover, learn to yaw, learn to land, then turn the automation on and let it do the boring parts.
One-key takeoff and landing plus the 3D flip round out the beginner feature set. Same advice as above: the flip is a reward, not a lesson.
The beginner drone setup workflow, step by step
This is the order I run it in, every time, on every drone, including the ones I fly for money.
Step one: check the airspace and the rules. In the US, recreational flyers need to pass the free TRUST test and carry proof of it. Registration is required for anything over 0.55 pounds. Then check the airspace itself: airports, controlled airspace, national parks, and most stadiums are off limits, and local rules can be stricter. Do this at home, not in a parking lot with the props spinning.
Step two: charge everything, including the things you forget. Flight batteries, the controller, and your phone. A controller at 30% will die in the middle of a flight, and a phone at 5% means no camera feed. Charge all of it the night before.
Step three: update the firmware at home on wifi. Do not discover a firmware prompt standing in a field. Update the drone, the controller, and the app on your kitchen table, then fly it there for thirty seconds to confirm nothing broke.
Step four: pick a first field like you mean it. You want open space, no people, no power lines, no trees overhead, and a soft landing surface. Grass is better than asphalt. Empty is better than interesting. Your first ten flights should be boring to watch.
Step five: calibrate on flat ground. Compass and level calibration happen on a surface that is actually level, away from metal, concrete rebar, and your car. A bad calibration is the number one cause of a drone that drifts on takeoff and scares its owner.
Step six: set the limits before you arm it. In the app, set beginner or low-speed mode, cap the maximum altitude and distance, and turn on the return-to-home altitude if the drone has GPS. On a drone with optical flow, set a low speed and leave it there for the first few batteries. The drone does not care that you are taking it slow. Your confidence does.
Step seven: bind the controller and confirm the failsafe. Bind, then test what happens when the controller is off or out of range. On most drones the motors stop. Know that before it happens to you, not while it is happening to you.
Step eight: hover, and only hover. Take off, climb to three or four feet, and hold it there. Do not touch the right stick. Learn what yaw does. Learn what a small stick input actually translates to. Ten minutes of hovering teaches more than an hour of flying around.
Step nine: fly patterns, not freestyle. Once hovering is boring, fly slow rectangles and figure eights. Then practice nose-in hovering, which is where every beginner's brain short-circuits, because the controls reverse from your point of view. Nose-in hovering is the skill that separates a pilot from a passenger.
Step ten: land at 30% and never argue with that number. Land when the battery hits 30%. Not 10%, not when the low-voltage warning screams at you. LiPo batteries that get run to cutoff lose capacity fast, and a battery that has swollen should be retired, not nursed.
Step eleven: the after-flight routine. Let the battery cool before charging. Never charge a hot battery, and never leave one in a hot car, which in Phoenix means never leave one in a car at all. Check the props for nicks. Wipe the lens. Put it away folded.
The mistakes that end first flights
Flying in wind you would not stand in. If the trees are moving, a small drone is fighting. Beginners lose drones to wind more than to any other single cause, because the drone goes downwind and never comes back.
Flying over people or traffic. Beyond the legal problem, it is the fastest way to turn a hobby into a liability. Find empty space. It exists.
Trusting a battery you did not check. A swollen cell, a puffed pack, or a battery that takes an unusually long time to balance is a battery you retire. Battery fires are rare and completely avoidable.
Skipping the spotter with goggles on. If you are wearing the goggles, someone else has to be watching the sky. That person is not optional, and they are not a formality.
Learning on automated modes. Auto-follow and trajectory flight are great. They are also a way to fly for a year without ever learning to catch a drift, and that catches up to you the first time the automation does something you did not expect.
What I left out and why
I did not include FPV racing builds here. Racing is a different category with a different skillset, a soldering iron, and a much steeper repair curve. If you want to race, start with a simulator and a whoop, and come back to this guide when you want to shoot video.
I also left out GPS camera drones with gimbals, the ones in the mid-range class. They are excellent, and they are the right second or third purchase. For a first drone, a GPS camera drone that costs four figures is a lot of aircraft to learn on, and a beginner crash on an expensive gimbal is an expensive lesson. Learn on something you are not afraid to break.
Finally, I left out the toy-grade drones with no position hold at all. They are cheap and they are a false economy. A drone that will not hold still teaches you nothing except how to chase it across a field.
What this all costs
The purchase price is the smallest part of this. The real budget is batteries, props, and cards.
Batteries are the recurring cost of drone ownership, and heat is what kills them. Two batteries in a beginner kit gets you flying on day one, and you will want a third and fourth within a month. Buy them from the same listing when you can, so you are not mixing packs of different ages and cycle counts in the same session.
Props are cheap until they are not. Buy a spare set when you buy the drone. You will break one, and paying shipping on a two-dollar part is the most annoying way to lose a weekend.
The FPV kit includes two batteries and an SD card, which means the day-one box is genuinely flyable. The mini drone is the grab-and-go option, and its value is in how often you actually take it out.
Add it up over a year and the cost per flight is small. Add it up over a year where the drone sat in a closet because the setup was annoying, and it is infinite.
The first month, in one paragraph
Fly ten minutes a day rather than two hours on a Saturday. Hover before you fly patterns. Fly patterns before you fly fast. Land at 30%. Keep the goggles off until you have a spotter. Retire the battery the moment it looks wrong.
Do that and the drone stops being a machine you are nervous about and becomes a tool you reach for. That transition is the whole point of a beginner drone setup, and it takes about a month of boring, careful, genuinely fun flying.