Choosing your first drone comes down to one question most buyers never ask out loud: do you want footage, or do you want stick time? Everything else, the specs, the bundle contents, the forum arguments, follows from that answer. Get it wrong and you end up with a camera drone you find boring, or an FPV quad that never produces a clip you would show anyone.
I have been flying commercially since 2015, when I started on a Phantom 2 and learned the hard way that a "25 minute flight time" claim and a 108 degree Phoenix afternoon are two different numbers. I have owned or flown more than 20 drones, from $300 toys to a $15,000 enterprise rig, and I have shot real estate, weddings, and solar farm inspections with them. Choosing your first drone is the question I get asked most, usually by someone who is about to spend real money on the wrong half of the hobby.
So here is the split, the two machines I would actually point a beginner at, and the day-one workflow that keeps you from breaking anything.
Why you should trust me
I fly four to five days a week, mostly in Arizona heat, which is the harshest test environment a consumer drone will ever see. My logbook is full of battery degradation data, gimbal failures, and the exact point where a manufacturer's flight time claim stops being true. I have lost two batteries to Phoenix summers. They swelled and died at 80 percent health, and neither one gave me a warning before it happened.
That experience shapes every recommendation I make. I do not care what a drone does on a mild morning with a fresh pack and no wind. I care what it does on the fourth flight of a 105 degree afternoon when a client is standing behind you waiting for a shot.
The one question that decides it
Answer this honestly: at the end of a good session, what do you want to have?
If the answer is "a clip or a photo I can send to someone," you want a camera drone. The defining feature is not the camera itself, it is the gimbal. A three-axis gimbal is what turns a shaky flight into usable footage, and it is the single line that separates a real camera drone from a flying toy.
If the answer is "the feeling of flying through a gap and pulling out the other side," you want FPV. FPV is flown through goggles with no stabilization, no automated return, and no safety net. It is harder, it is cheaper to crash, and it produces footage that looks nothing like a camera drone.
Plenty of people end up owning both. But your first purchase should match the thing you will actually do next weekend, because a drone that sits in a closet is the most expensive drone you can buy.
How I judge a first drone
Three things matter more than any spec on the box.
Flight time claims get cut by a third. In real heat and wind, take whatever the box says and plan for 60 to 70 percent of it. That number changes how many batteries you buy, and batteries are the real cost of this hobby.
The app is part of the product. A drone with a buggy app is a drone that will not fly when you need it. Firmware updates that require an account, features that vanish after an update, and gimbal calibration that fails on a phone are all things I have dealt with. DJI owns the consumer market largely because that part of the experience works.
Sub-250g is worth caring about. If you are in the United States, a drone under 249 grams sits in a much friendlier regulatory lane for recreational flying than a heavier one. It also travels better, and it hurts less when you crash it.
The camera-drone path
This is the right first drone for most people, and it is not close. A camera drone gets you into the air with stabilization, automated return, and footage that looks like something. You spend your first month learning to frame a shot instead of learning to keep the thing in the air.
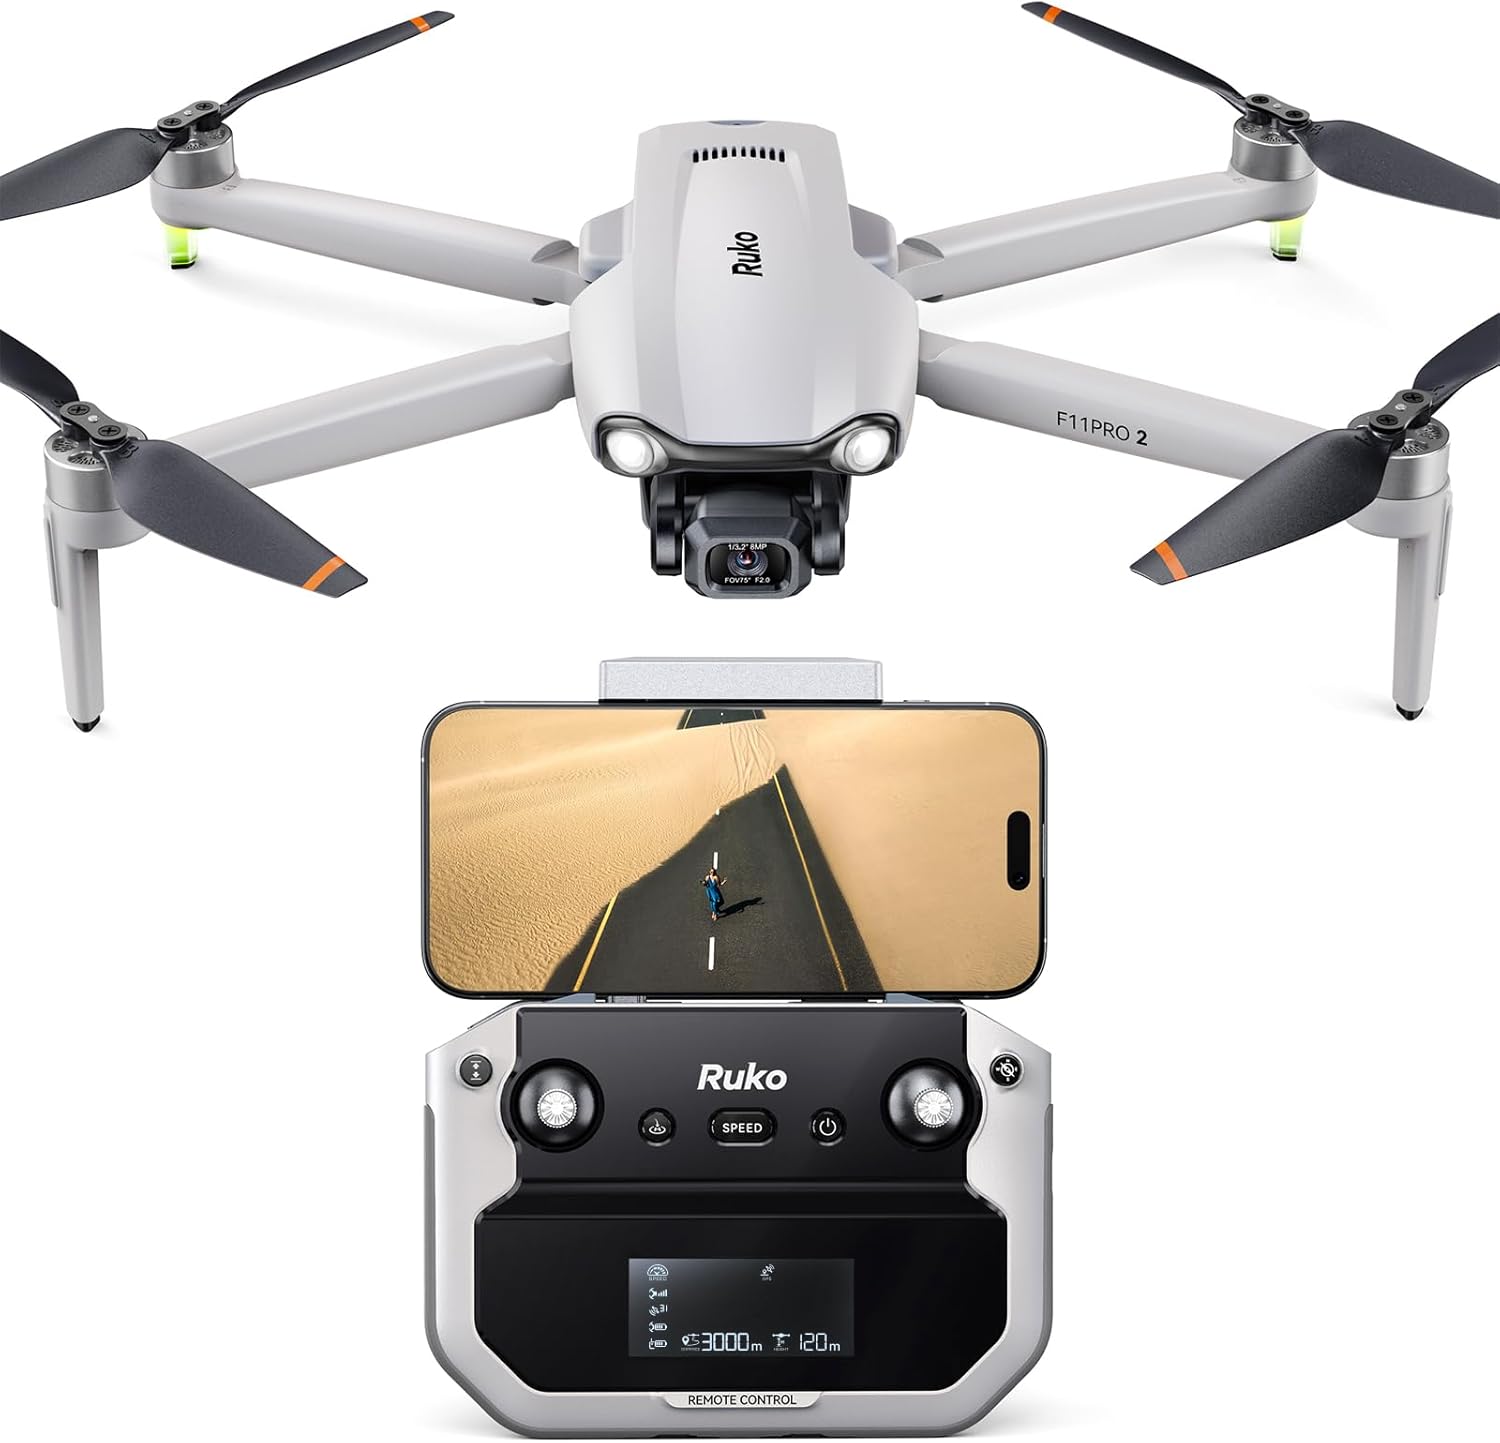
The camera pick: DJI Mini 4K Lightweight UHD Drone, Under 249g | 12MP Camera, 3-Axis Gimbal, 10 km Video Transmission, 31-Min Flight Time | For Beginners & Travel Photography + 64GB Card + BackPack + Landing Pad +More
 Visit on Amazon →
This is the drone I hand to people who tell me they want aerial photos of their own property, their trips, and their kids at the lake. The three-axis gimbal is the whole story here. It is what keeps the horizon flat when you are nervous on the sticks, and it is what makes the difference between footage you keep and footage you delete.
The sub-249g weight is a real advantage, not a marketing line. It keeps you in the recreational category in the US, it slips into a jacket pocket, and it means a crash is usually a bent prop and a lesson rather than a repair bill.
The 12MP camera is a daylight camera. It will make clean, sharp stills and 4K video on a bright day, and it will get noisy in low light, because that is what small cameras do. If your dream shot is a dusk cityscape, understand that going in.
The bundle matters more than people expect. The 64GB card, backpack, and landing pad are things you would otherwise buy in the first week, and the landing pad is genuinely useful in the desert where every surface is either gravel or something that will scratch a gimbal. Buy the kit with the extras.
Flaws but not dealbreakers: The 31-minute flight time claim is a lab number. In Phoenix summer heat, plan on landing around the 20 minute mark, and land at 30 percent battery rather than pushing to the auto-land warning. Also budget for at least one spare battery, because one pack means roughly 20 minutes of flying per trip.
Anyone who wants stable aerial video without a learning curve should start here.
The FPV path
FPV is the other half of the hobby, and it is a different skill entirely. There is no gimbal, no GPS hold, and no return-to-home button. You fly through goggles with a live feed, and the moment the video drops, you are flying blind. It is the most fun I have in this hobby and the most expensive way to learn, because you will crash.
The good news is that you can start small. A ready-to-fly kit gets you goggles, a controller, and a quad in one box for less than the cost of a mid-range camera drone, and the smaller the quad, the less damage a mistake does.
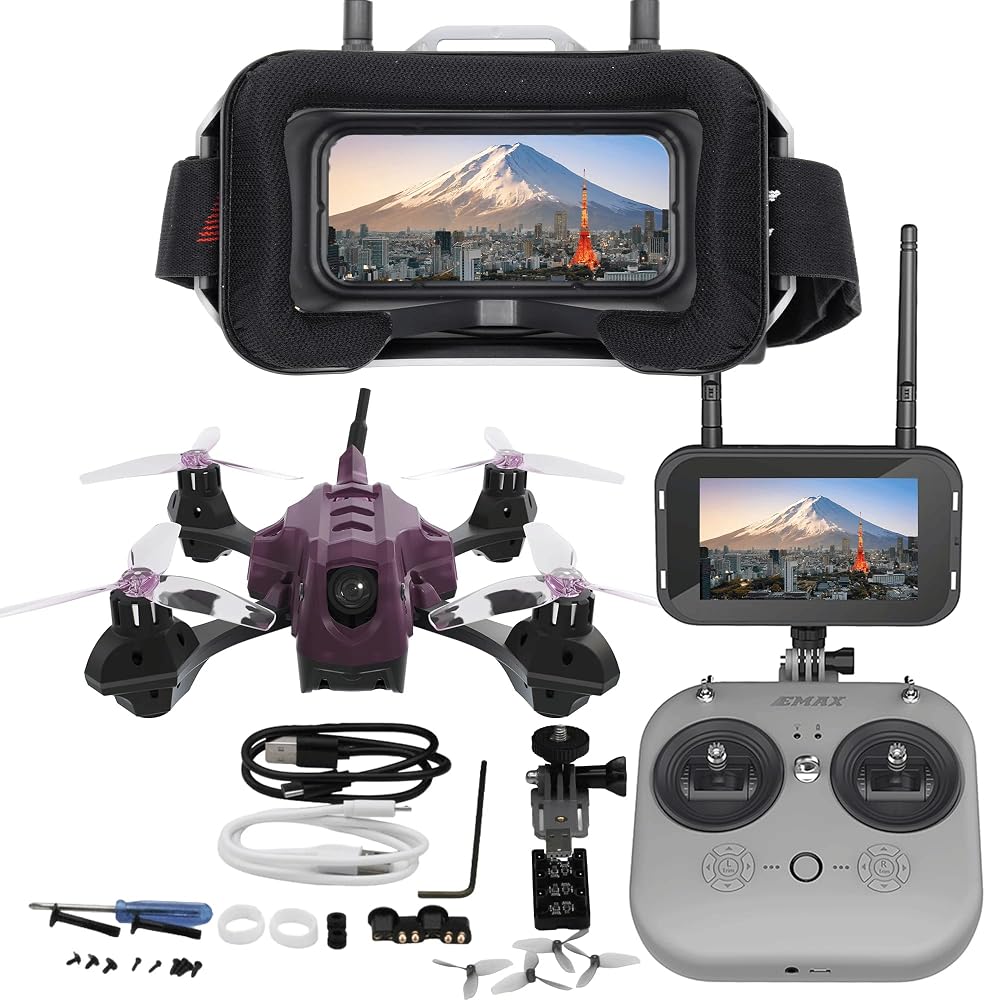
The FPV pick: Tinyhawk Lite Adventure RTF Kit Ready to Fly FPV Drone Kit with Goggles and Controller E8 ELRS 1s 65mm Outdoor Quadcopter with Camera Set
 Visit on Amazon →
This is the kit I point beginners at when they tell me they want to learn FPV and do not want to solder anything. Ready to fly means exactly that: the goggles, the controller, and the quad arrive together and work together, which removes the single biggest reason beginners quit, which is a radio that will not bind to a receiver they did not know they needed.
The ELRS link is the part I like most. It is the modern protocol, it is reliable, and it means the gear you learn on is not obsolete the moment you get good.
It is a 1S, 65mm machine, so it is light, it is quiet enough for a backyard, and it is rated for outdoor use. The camera is there for the flying experience, not for cinematic output. Do not buy this expecting gimbal-smooth footage. Buy it because you want to learn throttle control, cornering, and recovery, and because crashing a 65mm quad into grass usually costs you a prop and your dignity.
Flaws but not dealbreakers: The included goggles are beginner goggles. They will get you flying and they will show you whether you love FPV. If you do, you will replace them. Also, the kit does not come with spare props or extra batteries, and you will want both before your second session.
Anyone who wants stick time and does not mind crashing to get it should start here.
The first-flight workflow
This is the sequence I walk every new pilot through, and it works on either drone above.
Step one: sort the rules before you charge anything. In the US, take the free recreational knowledge test before your first outdoor flight, and register the aircraft if it is at or above the weight limit. Know whether the field you plan to fly is controlled airspace. Ten minutes of homework prevents the conversation nobody wants to have.
Step two: update firmware and set up the app at home. Do not do this in a field with a dead phone. Charge the controller, charge the batteries, install the app, create the account if it demands one, and confirm the drone and the controller are talking. Every minute spent here is a minute not spent troubleshooting on a tailgate.
Step three: charge to full, but store at half. A battery stored at 100 percent in a hot garage ages fast. Charge the night before you fly, and if you are not flying for a week, bring the packs down to storage level. This is the single habit that gets you the most cycles per battery.
Step four: pick a field, not a yard. Find an open space with no people, no power lines, and no trees at head height. Grass is better than asphalt. Bring a landing pad if you have one, because dust and grit are what kill gimbals and motors.
Step five: calibrate on site, in the open. Compass calibration in particular hates being done near a car, a fence, or a metal bench. Do it in the clear, and if the app asks you to move, move.
Step six: first flight is a hover. Take off, climb to about eye level, and just hover for one full minute. Do nothing else. You are checking for drift, for odd vibration, and for whether the gimbal holds the horizon. If anything feels wrong, land and fix it before you fly a pattern.
Step seven: learn return-to-home before you need it. On a camera drone, set the home point, trigger return-to-home from a short distance, and watch what it actually does. On an FPV quad, there is no return-to-home, so instead learn where your failsafe drops the throttle and how far you can go before the video feed breaks up.
Step eight: land at 30 percent, every time. The last 20 percent of a pack is where voltage sags, where the drone starts dropping altitude on its own, and where most beginner crashes happen. Land early. Your batteries will also last longer.
Step nine: log the flight. Note the temperature, the wind, the flight time, and the ending battery percentage. After twenty flights you will have a real picture of what your drone does in your conditions, which is worth more than any spec sheet.
Caveats that bite beginners
Heat is the enemy. Batteries swell and die in summer heat, and a pack left in a hot car is a pack you will be replacing. Fly in the morning, keep spares in the shade, and let packs cool before you charge them.
Wind cuts both ways. A sub-250g drone gets pushed around above about 15 mph, and FPV quads lose range and video faster in wind than in calm air. If the trees are moving, adjust your plan.
Props and batteries are the real cost. Neither pick above includes enough batteries for a satisfying session. Budget for spares up front, and buy props before you need them, because you will.
No drone is crash-proof. Obstacle avoidance is a safety net, not a pilot. I still fly like it does not exist, because the one time I trusted it, it did not see a thin branch.
What you end up buying beyond the drone
Neither purchase ends at the drone. You will want at least one extra battery, a spare set of props, a microfiber cloth, and a small hard case if you are traveling. On the camera side, ND filters are the one accessory that actually improves footage, because they let you hold a slower shutter speed in bright sun and get motion blur that looks like film instead of a strobing mess.
On the FPV side, your upgrade path is goggles and batteries, not the quad. The quad is the cheap part. That is the opposite of how people expect it to work, and it is worth knowing before you buy.
The bottom line
If you want footage, buy the camera drone and spend your first month learning to frame shots. If you want the feeling of flight, buy the FPV kit and spend your first month learning throttle control. Either way, buy the extra batteries on day one, land at 30 percent, and treat every flight time claim on the box as a number that was measured somewhere cooler than where you live. That is the whole decision, and it is a lot simpler than the forums make it.